While some digital marketing methods like social media can be relatively straightforward (at least in theory), email marketing can be a bit more complicated. Sending out an email to your list might be simple enough, but there are a lot of things you can do that might not be so obvious.
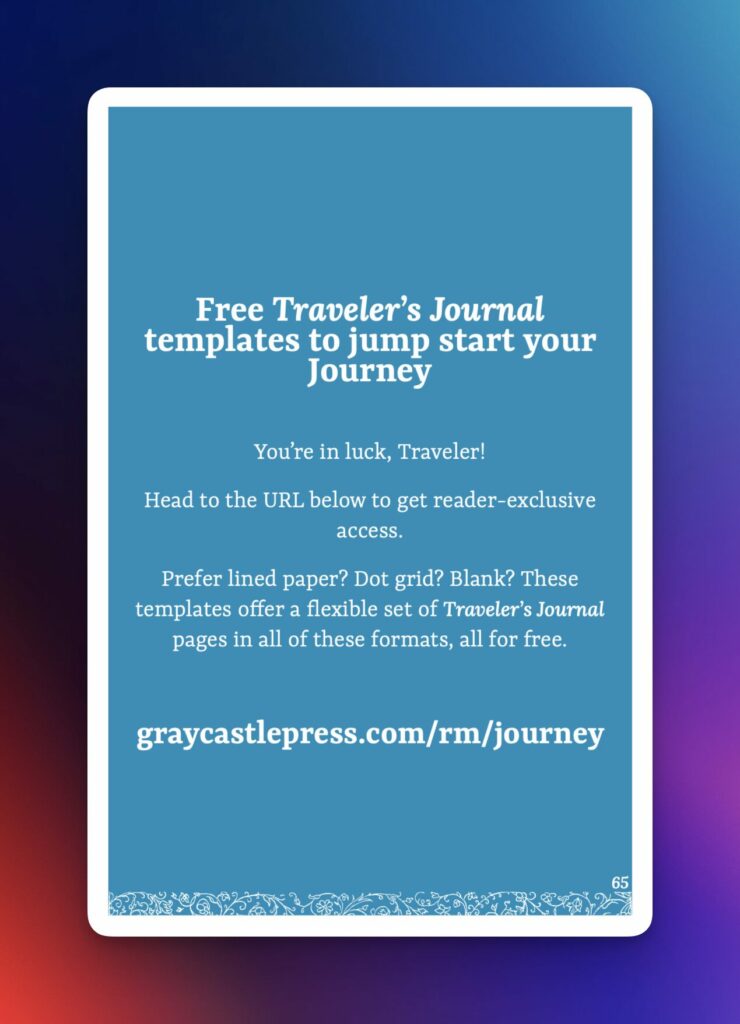
One of the most impactful ways I’ve built my email list is by offering freebies in my books and on my website. Chances are that folks reading this have come across one or more of them already! I call these free downloads “list builders” (though they’re often referred to as “lead magnets” elsewhere, more on that difference later) and they can take many forms. At their heart they’re something useful or valuable you can offer your audience in exchange for them joining your email list.
The idea is that once they sign up, your email system will automatically send out the requested downloadable and they’ll be organized into your email list. Then, as you send out more content about your new work and other content that delivers value, they’ll receive that too.
But setting these up isn’t always the most straightforward process, and it took me some time to work out the process for myself.
So now I want to hand that information off to you in the hopes that it helps you jump forward a bit! Buckle in folks, this might be my longest blog article yet.
Setting the stage for this article
This article aims to share my process for how I’ve set up the free list builders on my website and for my books. It’s worth opening this up with that clarification because there are other ways to do this and with other systems.
There are also a few “meta” items that are related that I want to cover. If you want to jump straight to the guide on setting up an automated list builder email, you can click here!
What makes a good list builder?
When thinking of what to create as a list builder, you want to focus on something that will actually be of use to the person who downloads it. We’ve all seen our share of “give me your email, you get this PDF you’ll probably never look at again” interactions online, and trying to avoid that is key. You want it to be something that they’ll get some solid benefit from.
It’s also useful to consider what you’re creating as a list builder and whether it applies to your audience. It’s easy to get caught up creating things that might actually appeal to someone outside of your audience, and then you have a list full of people who might not actually care about what it is that you do.
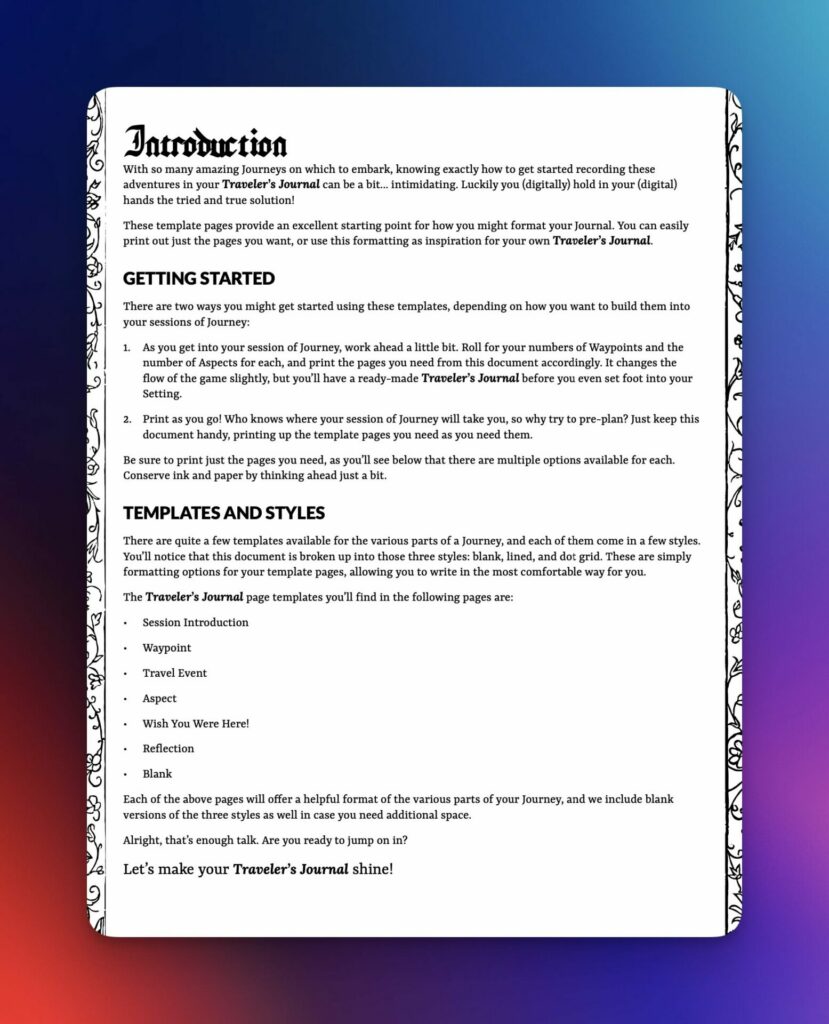
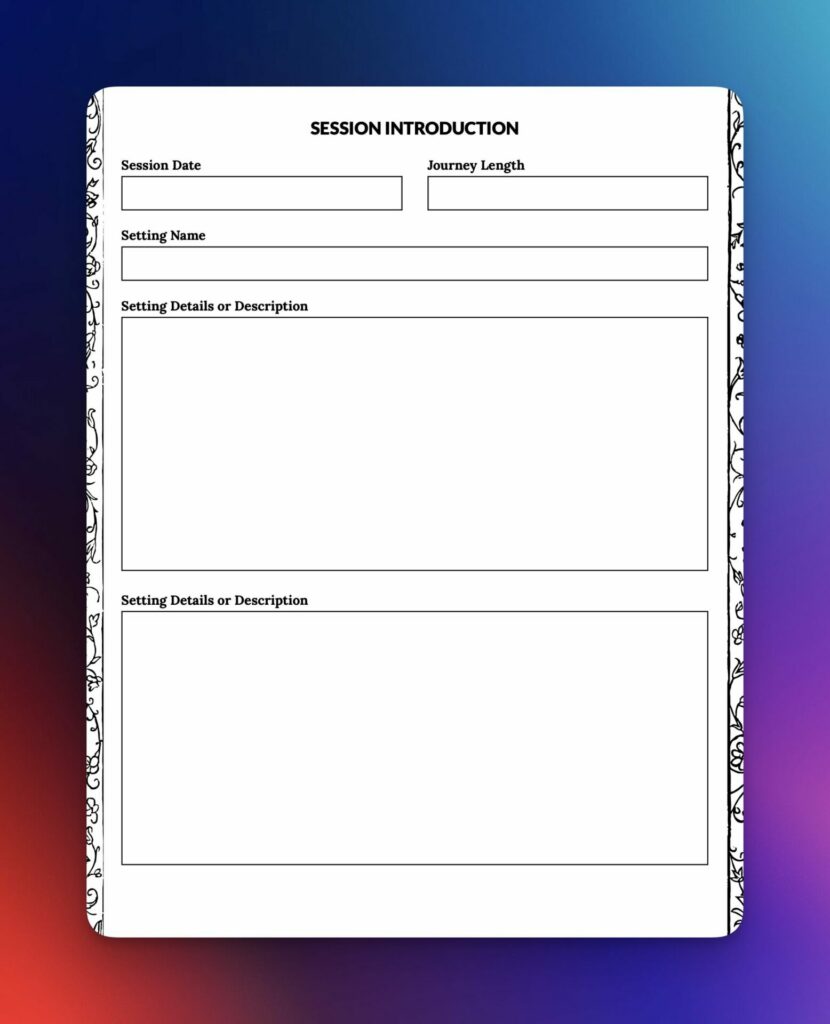
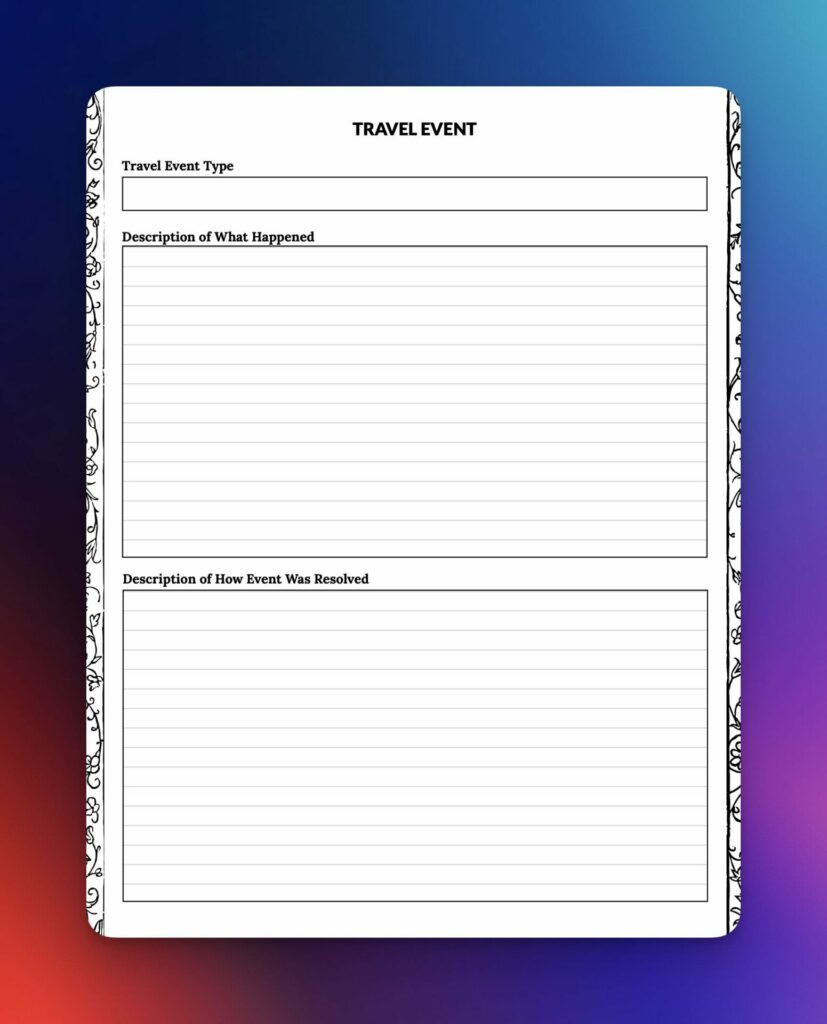
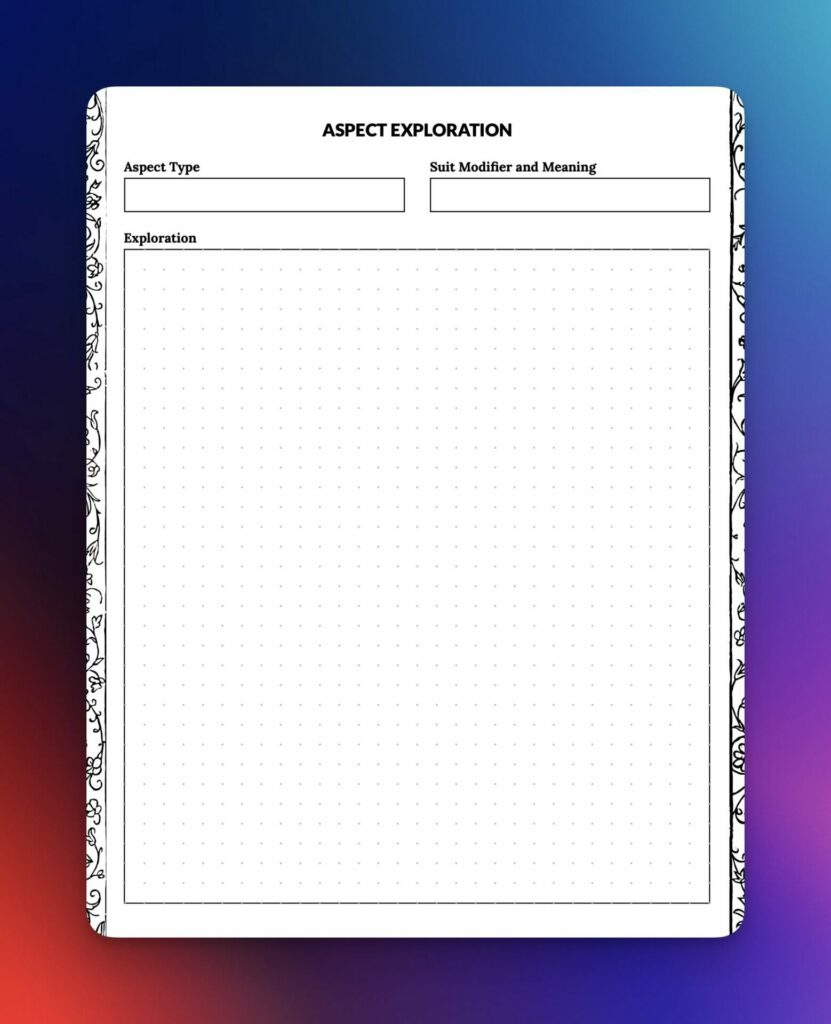
For example, in my solo worldbuilding game Journey, I offer downloadable PDF templates in a variety of formats to serve as a list builder. In this case, the player gets a set of PDFs they can use multiple times to give structure to their gameplay, and I end up with a list of Journey players that are likely to be interested in my other games.
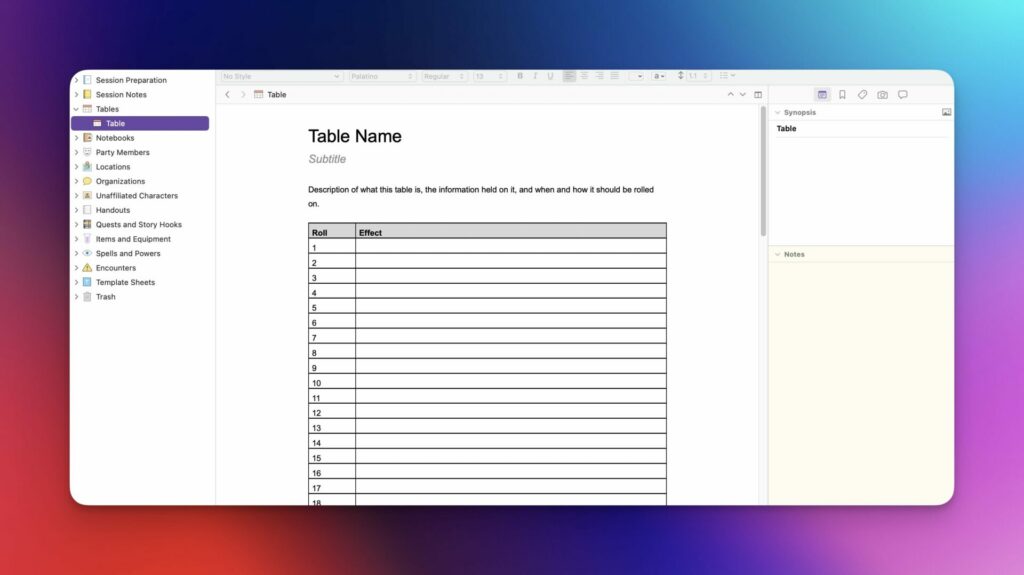
Another example is my Scrivener DM Binder template (probably my most popular list builder, second to my Journey templates) that I have on my website. Folks get a handy Scrivener template to use in their Dungeons & Dragons games and I have a great list of Dungeon Masters interested in digital resources.
It’s really worth it to put some additional thought and strategy behind these freebies, as you want to be sure the people in your list are folks who are more likely to care about what it is you actually do, the kinds of content you’ll be sending out.
Otherwise it’s just another way to scream into the void that is the internet (and we have a lot of those already 🤣).
“List Builder” versus “Lead Magnet”
Just a point of clarification here, you’ll often see these same kind of free downloads called “lead magnets” elsewhere online, and it’s a term I’ve started moving away from. “Lead magnet” feels like it applies specifically to businesses who are looking for warm leads to sell to, where I approach the process more for building my email list for use in my ongoing communication with my players and release of future games.
It’s a small distinction, but one that is meaningful to me so I wanted to explain my intent behind choosing my words specifically.
Why MailerLite?
I’ll talk specifically in this article about the email marketing tool MailerLite, mostly because that’s the one I use. I’ve been a MailerLite user for years, and within the last year even started paying for the service. There are a lot of options out there, some of which are very solid and some of which are very popular (not all of which are in both of those categories).
The steps in this process should be relatively the same no matter what system you use, luckily, and the considerations around it are generally universal.
Also, if you decide you’d like to check out MailerLite and end up purchasing a paid tier of their service (which most folks starting out with email marketing won’t need), the affiliate links to it throughout this article will give me a small commission at no cost to you, and you’ll get a $20 credit. Just so that’s called out.
But to be honest, I’ve shared it with people for years even without that affiliate link. I really do like it that much.
WordPress and the Contact Forms 7 plugin / connector
Another process related to (but not covered in) this article is setting up the forms to let users sign up on your website, which might take many forms. MailerLite itself offers some really nice ways to accomplish this out of the box, which work really well for some.
For me, the Graycastle Press website is a self-hosted WordPress-powered website, and I use the plugin Contact Forms 7 to manage the various user-facing forms on it. There’s a really nice add-on plugin called the CF7 Connector that lets you hook your forms up to either MailerLite or Mailchimp, and so that’s what I use to push user signups over to my email tools.
You don’t have to do it this way, and this article won’t go into greater detail on how to set up all of those parts and pieces, but it’s worth looking at your options.
My advice if you’re starting out and aren’t super comfortable with building website and custom things like that would be to stick with MailerLite’s (or whatever tool you’re using) out-of-the-box options as they tend to be a lot more approachable.
How to set up list builder downloads with MailerLite
Create a MailerLite account
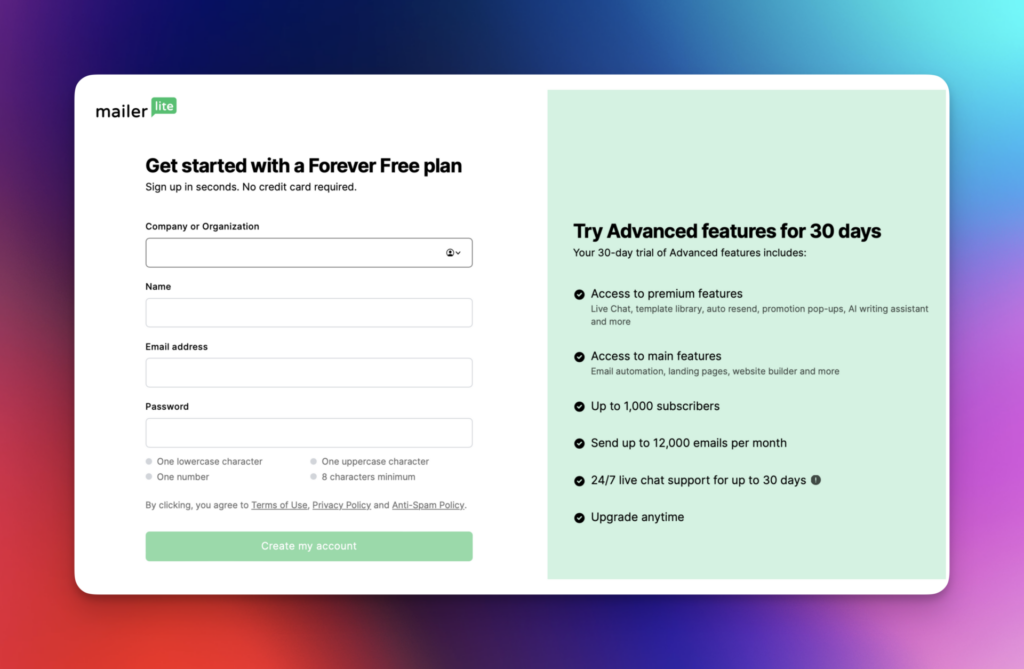
You can visit the MailerLite Sign Up page here (that link will get you a $20 credit as well, if you decide to sign up for the paid plans later). Registering will be free, and you’ll get a free trial to the more advanced features (but can continue with a Free plan once that trial period is over).
Note: If you’re planning to use another email marketing tool and you’re following along for the general steps wherever you’re going, you can sub MailerLite with whatever system you’ll be using. The steps below won’t be as accurate for your system, but should still make sense.
Set up your email groups
I tend to set up automations based on when a new email list member joins a “group” in Mailerlite. Other systems might refer to these as “lists,” but the idea is the same. They’re kind of like buckets that hold different groupings of subscribers. There may be other ways to set this up in MailerLite, but with how automations let you move people from group to group, I like how it works.
Once you’re in your Mailerlite dashboard, you can click the Subscribers menu item on the left, choose the Groups tab on the page that loads, then click Create group.
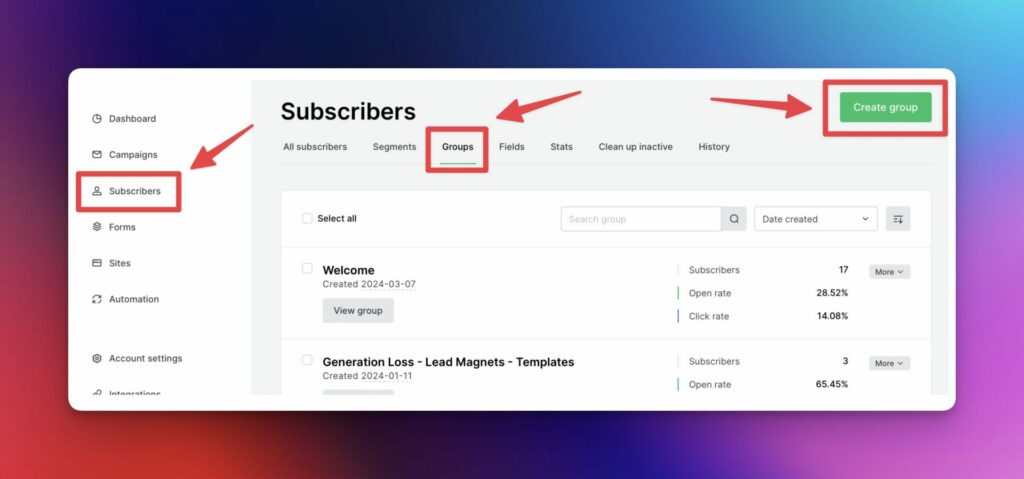
You can name your group whatever you like, but I tend to follow this naming convention with most things in my MailerLite account: Related Game/Title - Category - Name
So for my Traveler’s Journal template freebie for Journey, I’d name that group Journey - List Builders - Traveler's Journal Template (though in the example below, I’ve yet to update the term “lead magnet” to “list builder” 😅)
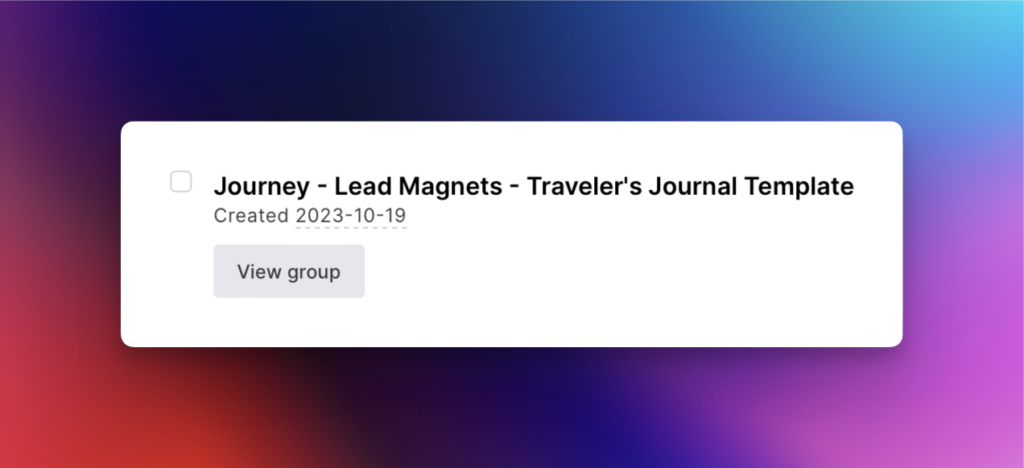
This helps differentiate between groups easily, especially when we start building our automations. I’ll refer to this newly created list as the “list builder group” for the rest of the guide, for clarity’s sake.
I also recommend creating an “All Subscribers” group, which acts as a handy catch-all of every subscriber in the system.
Set up an automation
With your list builder group successfully created, we’re ready to move on to creating our automation! Automations are easy to build automated processes that can be triggered by different events in MailerLite.
In this case, we’ll be creating a new Automation that is triggered when someone joins the list builder group we creates above. They’ll get sent an email automatically in return with a link to download the free resource, then have their email copied to the All Subscribers group.
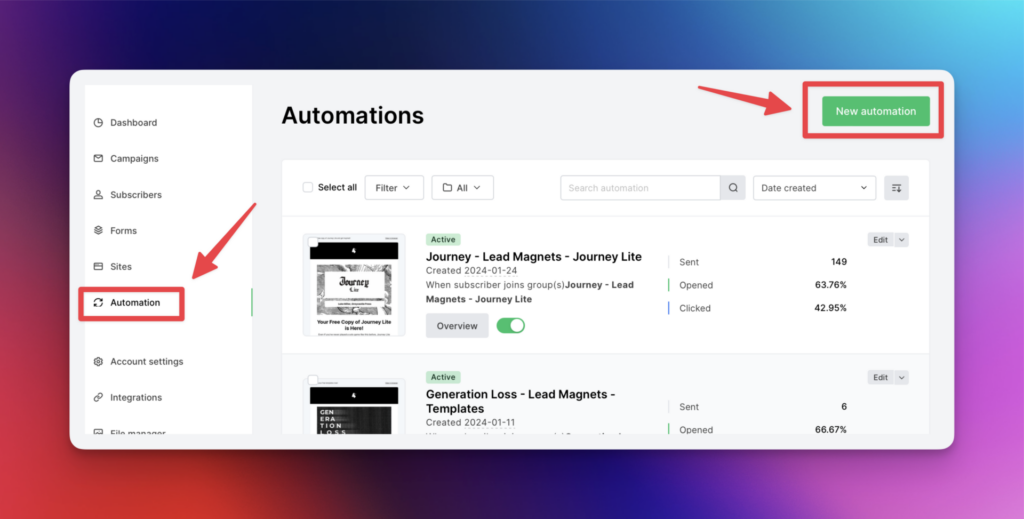
First, click on the Automation item on the menu to the left, then click New automation and give it a name. Like above, I usually use the same naming convention for Automations as I do for Groups, which keeps things linked in my brain.
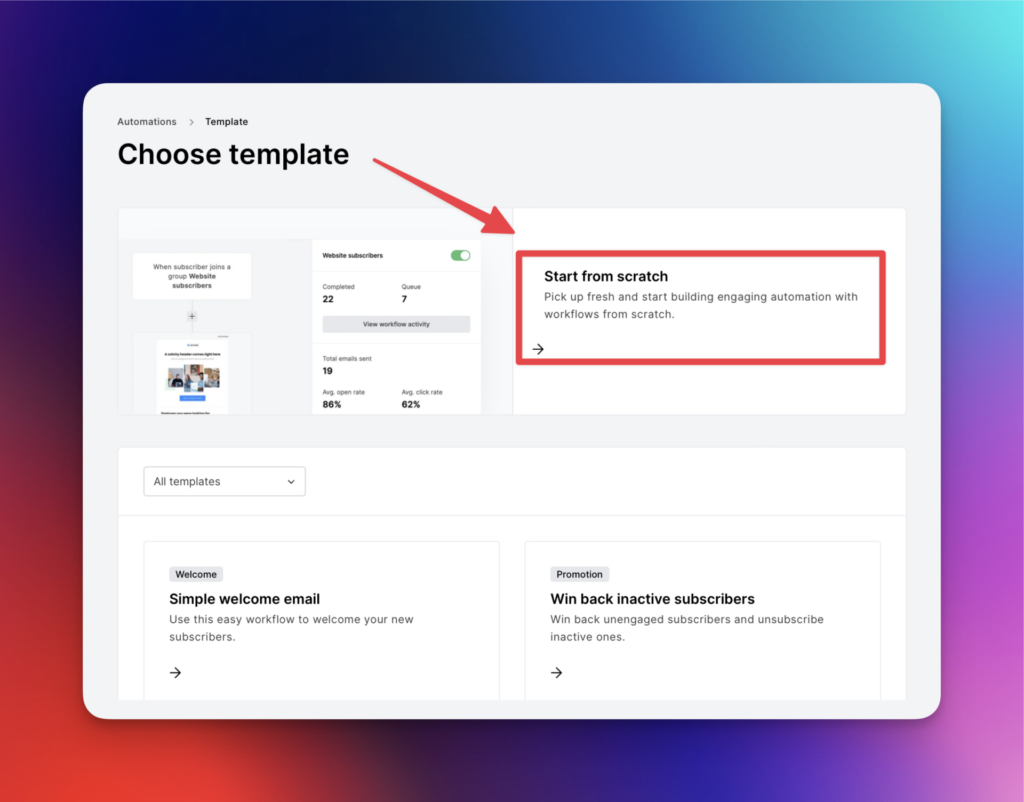
MailerLite has recently added some automation templates you can use to get started, if any look applicable, but for now just choose the Start from scratch option. I think seeing how a simple automation comes together can be helpful, and will make the other templates easier to use in the future.
Set up the Automation trigger
All automations are kicked off by something specific happening, called a trigger. This might be someone joining a group, someone clicks a link in an email, or an anniversary of a date on their subscriber record has been reached. We want to send out an email when a subscriber joins a specific group, in this case.
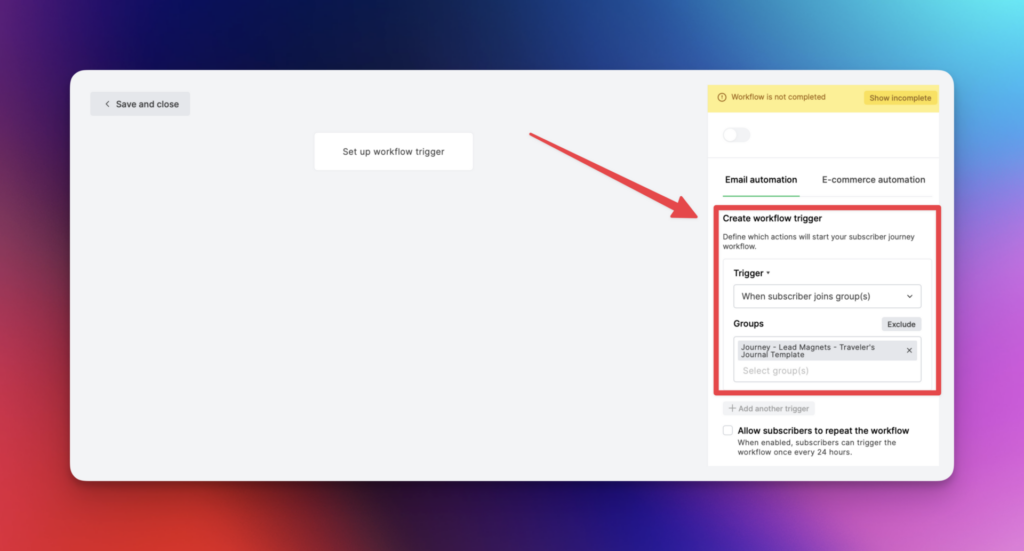
On the right hand side of the page, click the Trigger dropdown and choose “When subscriber joins group(s)” to fire our automation when someone joins a group, then use the text box that appears to find the list builder group and click Save.
Set up the automated email
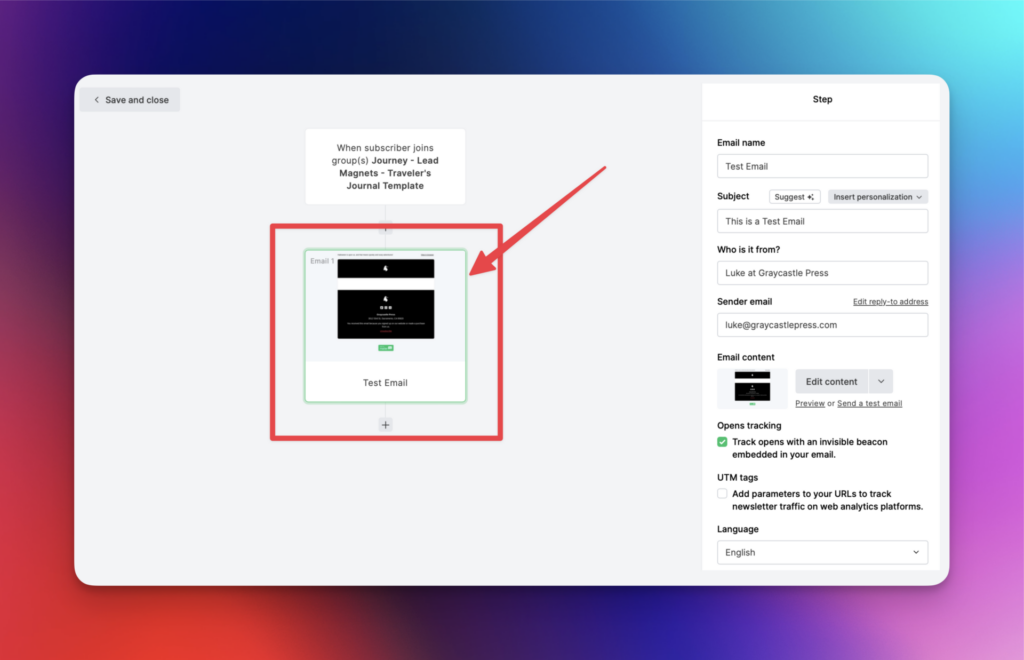
In the main workflow part of the screen, click the + button under the workflow’s trigger to add a new action, then choose Email.
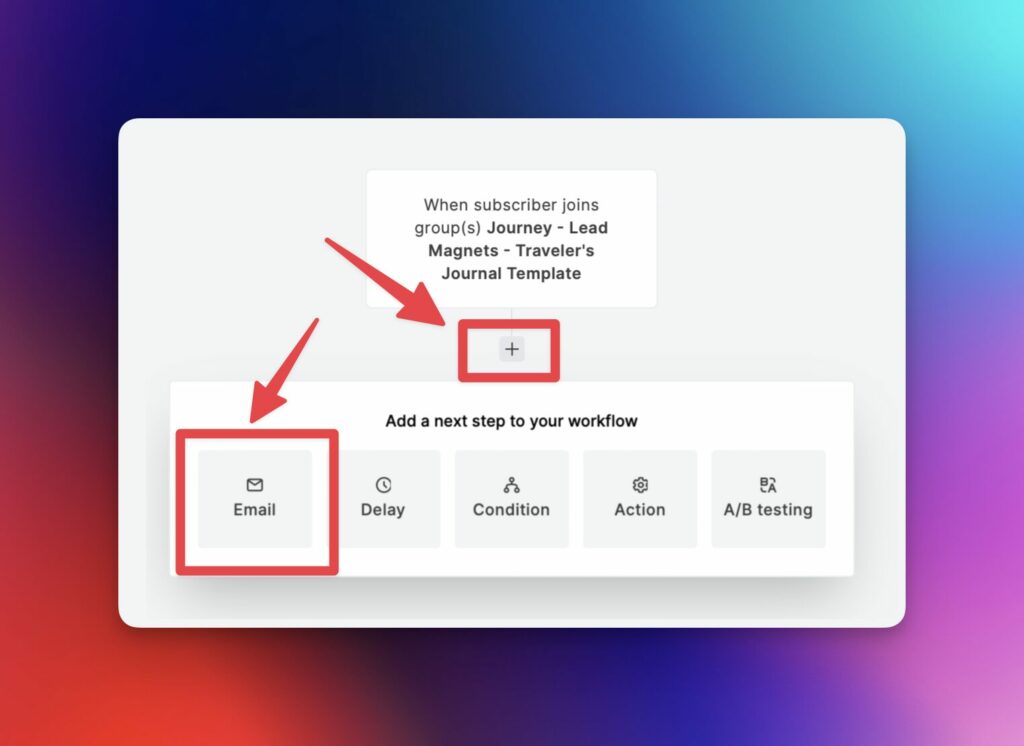
It’s worth taking a moment to look at the other actions available, which can be handy in building out different kinds of automations in the future. Knowing what your tools can do will help you make the best use of them.
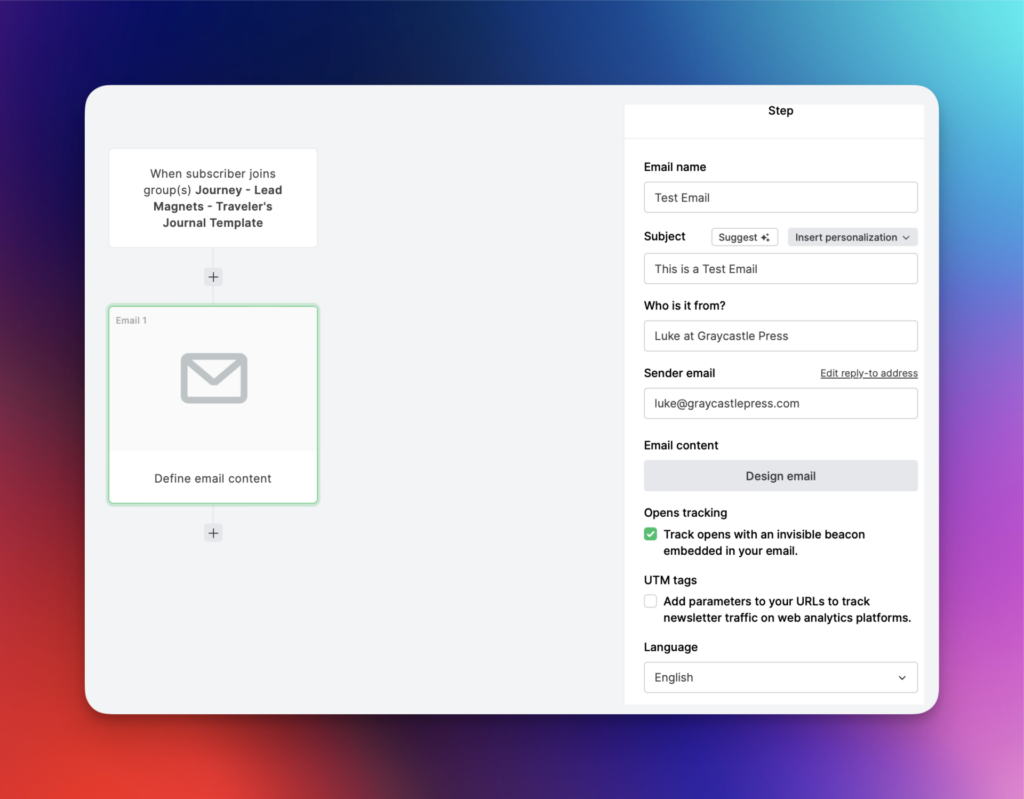
Use the menu on the right to fill out the details for the email and the Design email button to create the content of your email. Mailerlite has a lot of options for designing your email, including some pretty good templates, but I tend to use their drag and drop email builder for most of what I send out. Play with it a bit and find an email style you like.
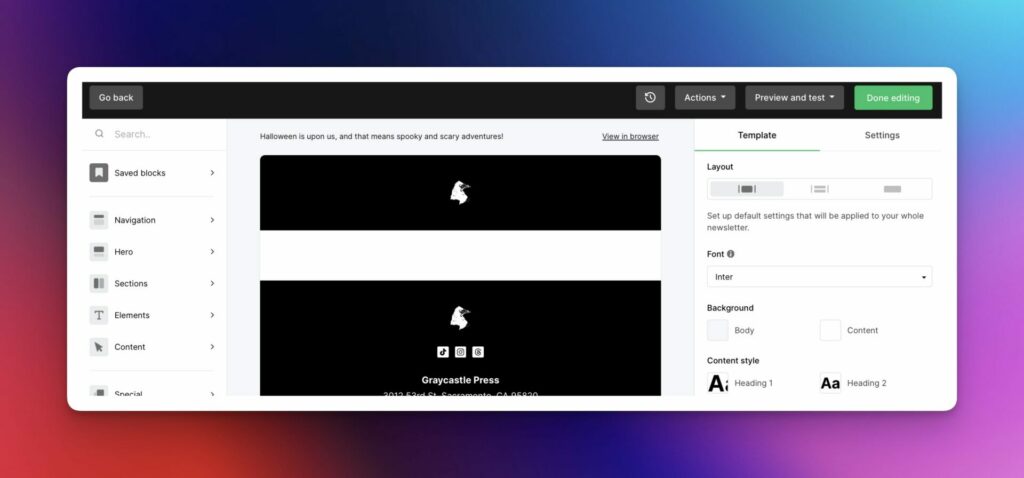
NOTE: If you want to keep things super simple and quick, you can choose the Rich Text email format option and let your email be just text.
I add a button in my emails to the file where it’s hosted on my website, but you could link to a document anywhere it’s publicly available, like Google Drive, Dropbox, etc.
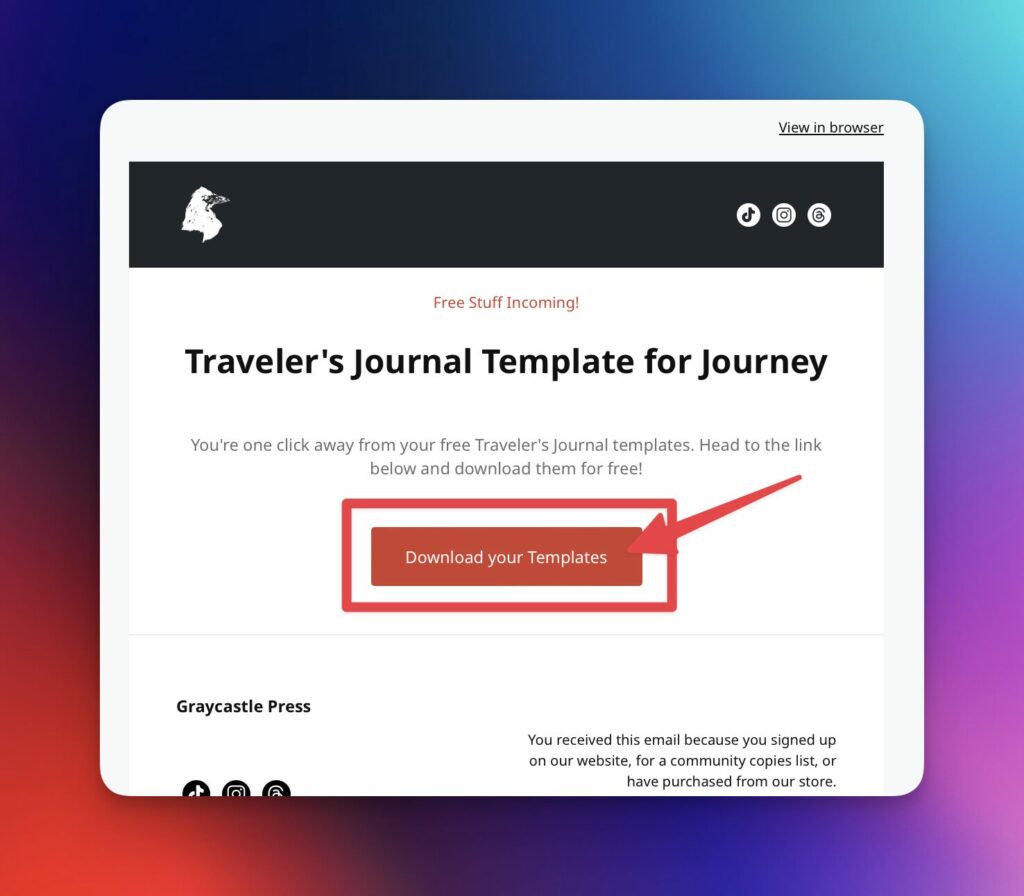
Finish the email and click Save back on your automation.
NOTE: Once you have a little time under your belt creating emails in MailerLite, you can actually save designs as templates to quickly whip up emails in the future. Super handy, and has saved me a lot of time.
Add the subscriber to the All Subscribers group
In the main workflow part of the screen, click the + button under your newly added email action and choose Action. On the sidebar to the right, choose “Copy to group(s)” from the dropdown and choose the All Subscribers group and then click Save.
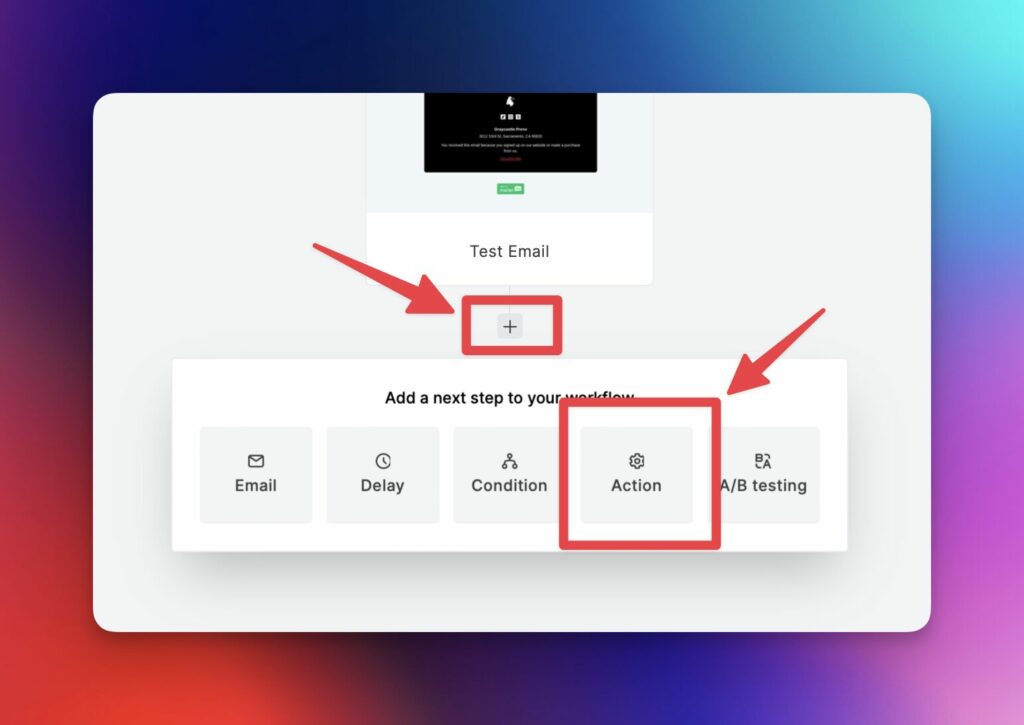
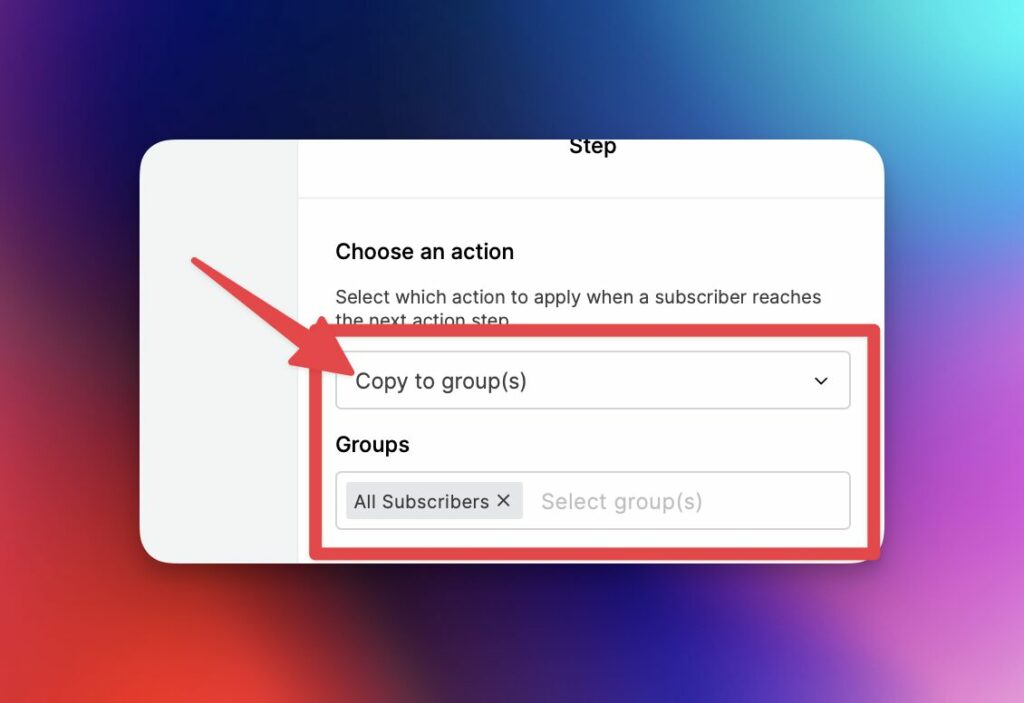
Just a note that I choose to copy the subscriber, which leaves them in the original list while adding them to All Subscribers. This is handy because if you make updates to the freebie in the future, you can send them out to just those people who actually signed up for it. I just did this with my updated Scrivener DM Binder template, notifying everyone who has signed up to receive it that a new version is available.
Name and save your new automation
In the main workflow part of the screen, click on the first square of the workflow that represents the trigger, then click the toggle on the right hand side of the screen to activate the automation.
Heads up, if you happen to have subscribers already in the list that triggers this automation, you’ll have some options to choose if you’d like to have them enter this automation now, or bypass them entirely.
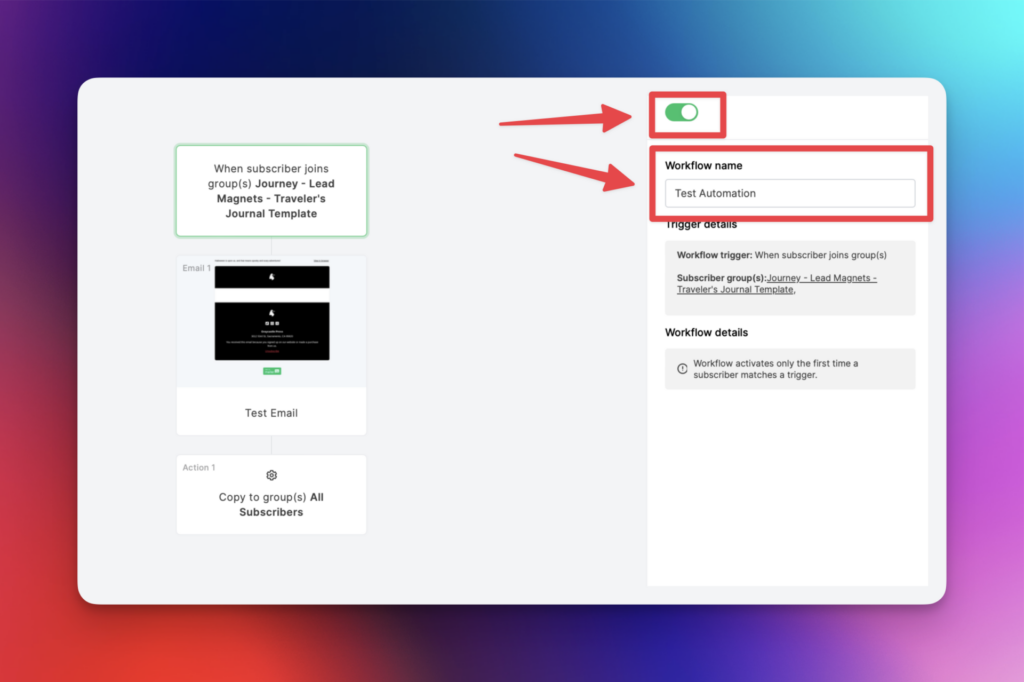
Congratulations! Any subscribers who sign up to this email list will now get an automatic email with the freebie they were signing up for.
Hook up your website to MailerLite
Now that your automation is ready to go, you need to have some way to let people sign up for it. If you prefer, you can explore MailerLite’s Forms and Sites tabs on your dashboard as they’ll offer lots of baked-in ways to give people a way to sign up.
If you have a WordPress website like me, MailerLite also offers an official WordPress plugin that will help you add your forms. There are also other options like the Contact Form 7 Connector plugin I named above.
The details of setting this part of the process up is a little outside the scope of this article, but if that’s something you’d want to hear more about let me know! If folks want to learn more about that part of my process, I’ll happily do another article about it.
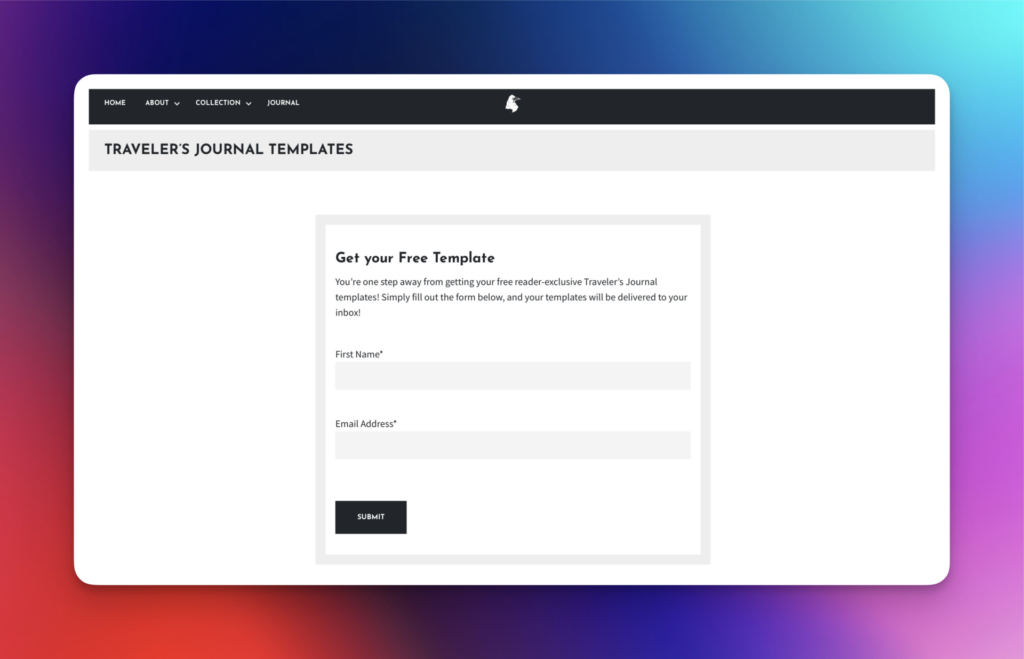
However you do it, set up somewhere you can send people that will let them sign up to be added to your new list (the one for your freebie, not the All Subscribers list).
Test your automation
The last step (and the one I always forget) is to test what you’ve built! You’re going to be sending potential customers, readers, etc to this page to get something for free, so you want that process to actually work smoothly and not drive people away.
Head to wherever you set up your email signup list and give it a try. You’ll want to make sure that the signup form works, that the email is received and the download link works, and that once the email is received that the new subscriber was added to the All Subscribers list.
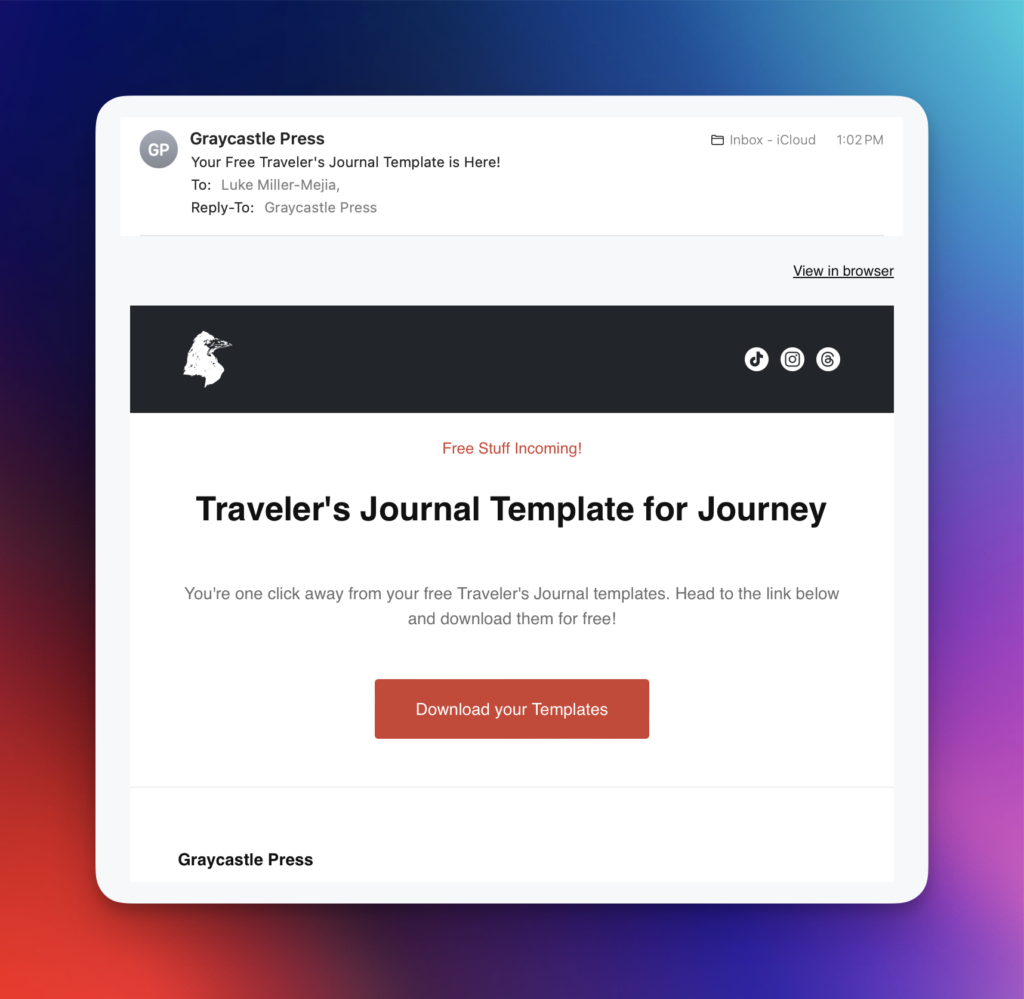
If it all checks out, congratulations friend! You’re all set to start sending people to your freebie signup form and getting them your super valuable free download!
Enhancing your list builder automations
Now that you have your first automation all set up, you might start to wonder what other things you might be able to do with this almighty power.
Here are a few ways I extend my automations and other kinds I make to help people who subscribe to my lists get more value with less manual work on my part.
Feedback request automation
Specifically for the free downloads relating to my own games and tools, I really want to get people’s feedback (and ideally a nice shiny 5-star rating on the marketplace where they purchased it), but that can be a frustrating process to manage.
Enter the time delay action on MailerLite automations!
By setting a delay of one week on all of my automations after the first email is sent and then sending a follow up, I can check in with people who got my downloads to request feedback. If these downloads are tied to a book (like my Traveler’s Journal templates for Journey) I can safely assume that person bought a copy of my game and ask them to leave a review.
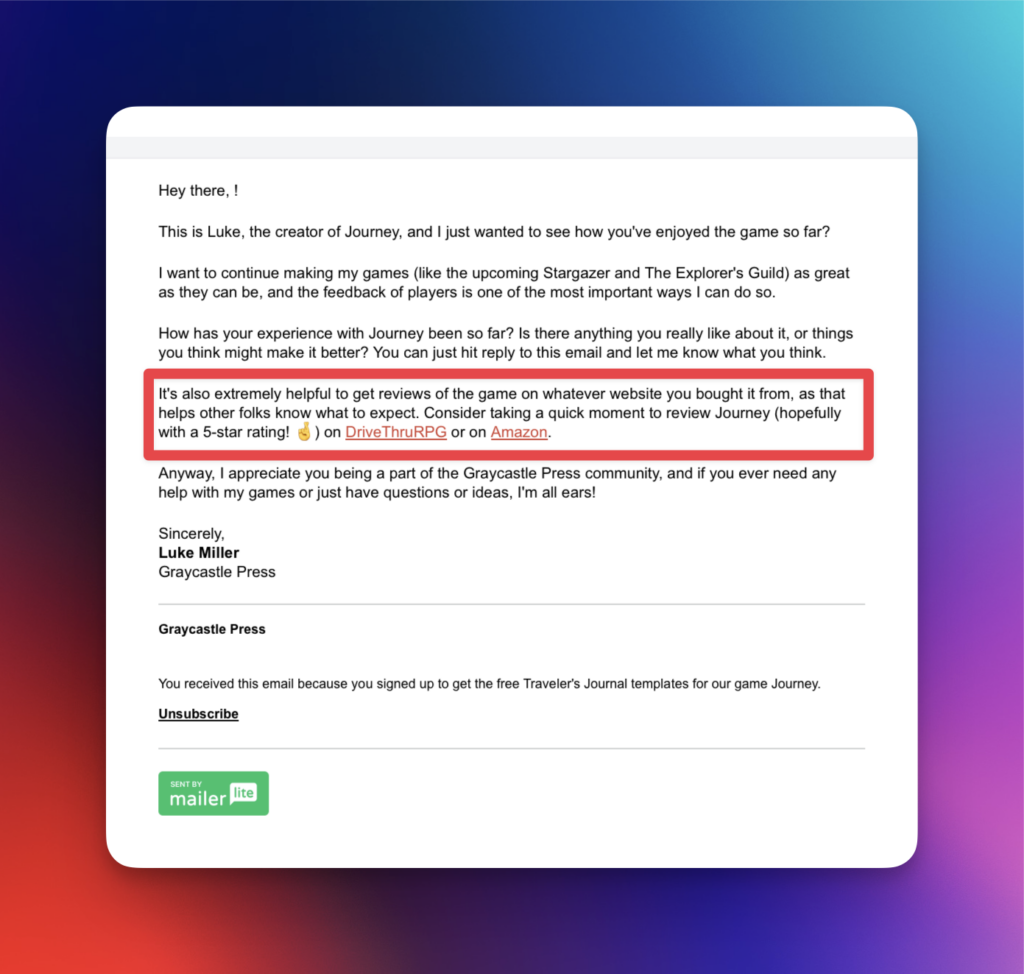
There are a lot of ways you might ask for feedback for your books, titles, and even the freebies themselves, so this is a nice area to experiment in.
Welcome emails (and series)
I have a group called “Welcome” in my own MailerLite setup that I copy subscribers to at the end my freebie download automations instead of “All Subscribers” as we did above.
One day after they are moved into Welcome (to prevent them getting hit with two emails at once), they get sent my welcome email where I introduce myself and what kinds of things they’ll see coming from my emails.
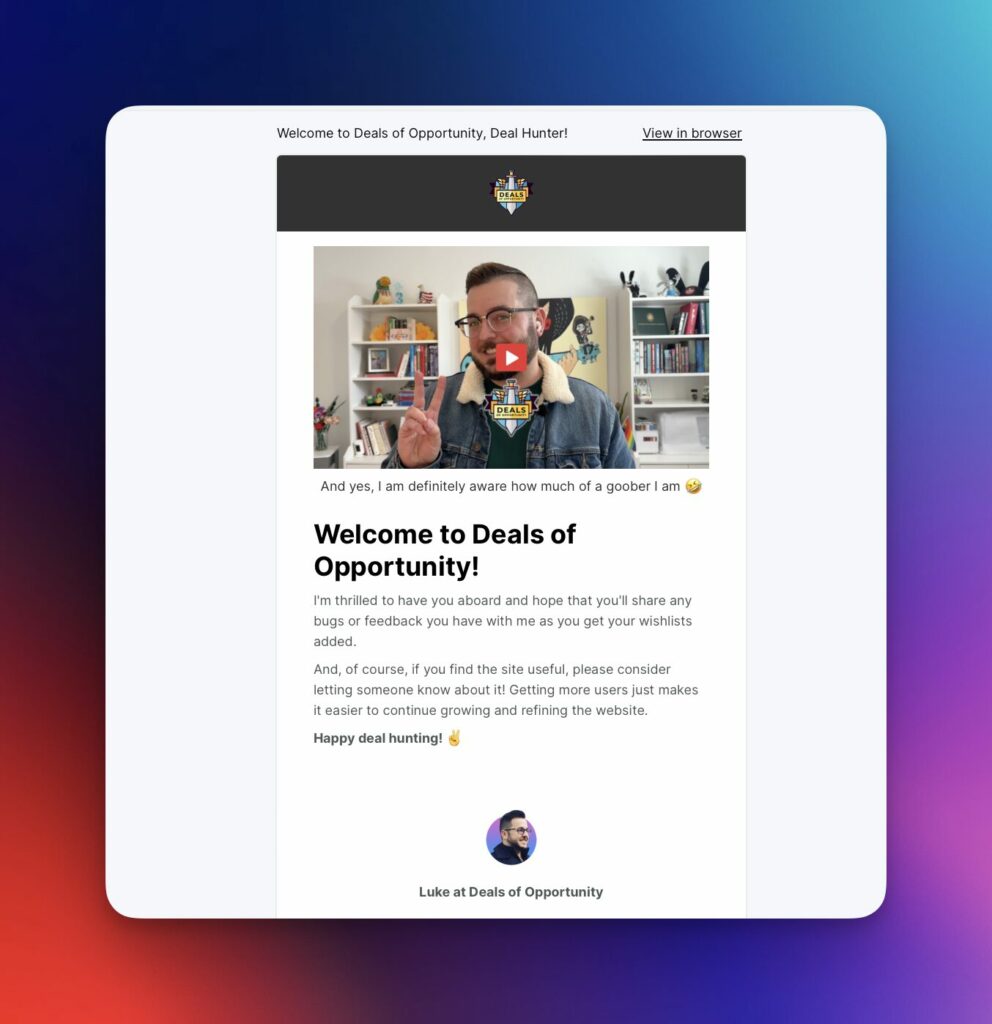
You can extend this even further by doing a longer welcome series, using a series of emails to introduce your products or books to your audience in a more spread out way.
I do recommend not adding people to your All Subscribers list while they’re still in Welcome, as this stops them from receiving other emails going out to the list while they’re still being introduced to what I do. It’s a small impact, but a better one for the subscriber even if they miss an email from me in the meantime.
Closing
Okay, so that was a long one folks, and we covered a lot of ground. With some practice, using autoresponders to drive your automated freebie downloads will let you find all kinds of ways to offer valuable things to your readers and players.
And in return, you’ll be growing your ability to directly communicate with those same players and readers.
