When it comes to options for apps to help you plan your campaigns and organize all of your ideas, there really are a ton out there. While some folks like to use webapps like World Anvil or Notion, both of which are wonderful, I tend to prefer using the offline writing app Scrivener for dungeon master binders and campaign planning.
Scrivener can feel a little mysterious or difficult to set up, as it’s a pretty multifunctional application that was built to help writers of all kinds organize their content. It’s also known for having a bit of a learning curve, though once you work out the kinks it can be really powerful. Still, learning how to set up your document to help organize everything you might want for your campaign can be a bit daunting, especially if you haven’t spent a some time learning the app.
If you want to skip the article and just grab the free template, you can click here to get it.
Personally, I’ve found the flexibility and features in the app to be really handy. I use Scrivener to organize everything about my current campaign, from session planning, holding character info, and building out my treasury of wondrous items and homebrew spells.
I even use a second Scrivener document as my more generic dungeon master binder, allowing me to store all of the creative bits and pieces that aren’t necessarily tied to my current campaign but that I want to keep for later.
Let’s explore campaign binders and how Scrivener can help you keep them organized!
Note: This Scrivener template was created in version 3 of the application. If you’re using anything earlier than Scrivener 3, this template will not work correctly (or, more likely, at all).
What is a tabletop roleplaying game campaign binder?
I think it’s helpful to start by nailing down what exactly I mean when I say ‘campaign binder,’ as different folks call them by different names and use them for different reasons.
To me, a campaign binder is a one stop reference shop for anything you need to know in your campaign. It can be tricky to try to remember that critical bit of information about the history of the party’s location, or what that one shop they visited sold and for how much. When I tell you how many times my group decided to go back and visit an NPC they met 10 sessions ago… well, it’s not infrequent.

And in the moment that your player is questioning you on that bit of esoteric but important (to them) information, flipping through your notebook for five minutes can be a bit nerve wracking.
Organizing your campaign into a ‘binder’ (regardless of the actual form that it takes) can really help to address those issues and make session planning even easier.
A campaign binder is your campaign reference document
As above, being able to quickly and easily pull out information while in-game can be a bit stressful. A well-organized campaign binder can really help to ease that process by acting as a single point of reference for all of that disparate info.
Ideally, a campaign binder is laid out in a way that makes it easy and quick to find what you’re looking for in a pinch, whether that’s info on a specific NPC, profile of a location your players are exploring, or a bit of lore from your world.
A campaign binder is your session prep and session notes
By pulling all of your campaigns information together, it makes it fast and easy to run session prep, or to compile your session notes after the week’s game is over.
I love having all of my session prep and recap notes in my binder, as it’s dead simple to flip around and pull info from various sections of the binder (and in Scrivener, link to relevant documents inside my binder for quick reference) and really easy for me to refer back to previous sessions to grab info in-game or while prepping.
A campaign binder is your collection of wild and amazing ideas
When you have a clean structure for all of the wild stuff a tabletop roleplaying game campaign might include you can really step back and look at the cool stuff you’ve found and created. It pulls all of your thoughts and creativity into a single spot, meaning you’ll never lose that scrap of paper you jotted down your wild idea for “sword made of jell-o” to the ether again.
A campaign binder isn’t necessarily for everyone
All said, you know your campaign prep best, and using a dedicated central repository like a campaign binder isn’t for everyone. In the end, the best tool for the job is the one that makes your life and job as a dungeon master easier, and not everyone’s brains work the same way in that regard.
What is Scrivener?
Originally released back in 2007, Scrivener is an application that is built to allow writers of all stripes to create and organize their content. It puts a lot of focus on the word processing experience and outlining content, breaking your binder up into individual documents that can be moved around in a simple folder structure.
Scrivener is an app for writers
Whether a novelist or a screen writer, Scrivener does a really great job of helping to keep your content organized and hold all of your research together in an organized fashion. Writers can add in inspirational images and other documents as well, making their Scrivener binder a true one-stop-shop for everything that they need to keep moving forward on their writing. They can even treat Scrivener like their own wiki, fully integrated into their content, by linking back and forth between documents (a feature I’ll talk more about below, so helpful for campaign binders).
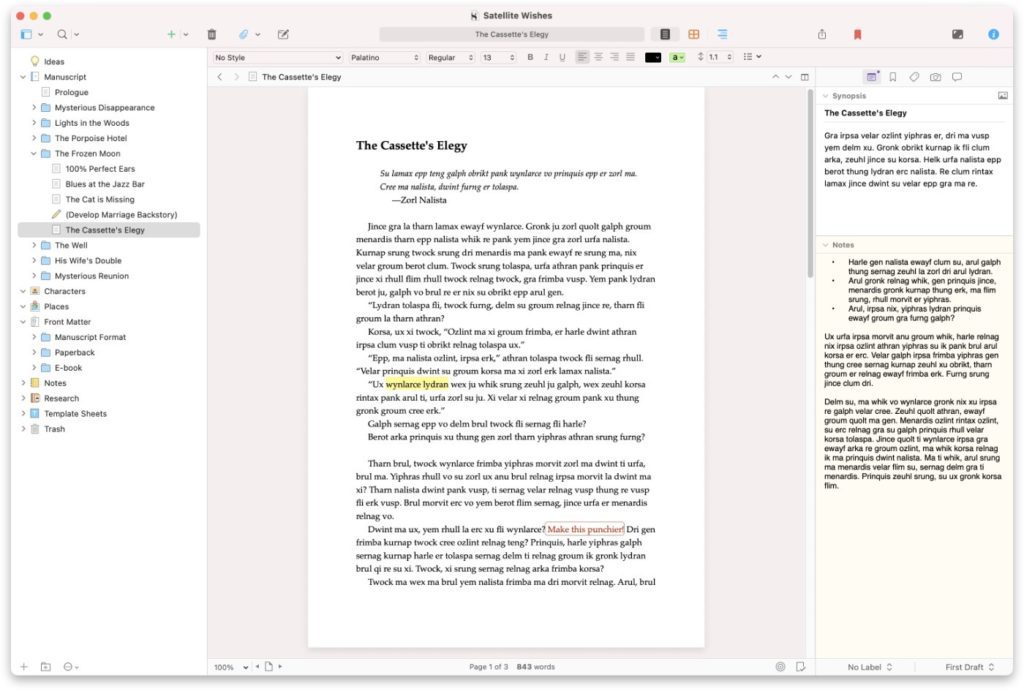
Scrivener is a word processor
Even with the most organized file structure in the world, you won’t get far in a creative written project without being able to put words on the screen. Scrivener sports a pretty flexible and powerful word processor, able to set up your writing environment across different kinds of content (and customize each as needed) and quickly edit and iterate on your work.
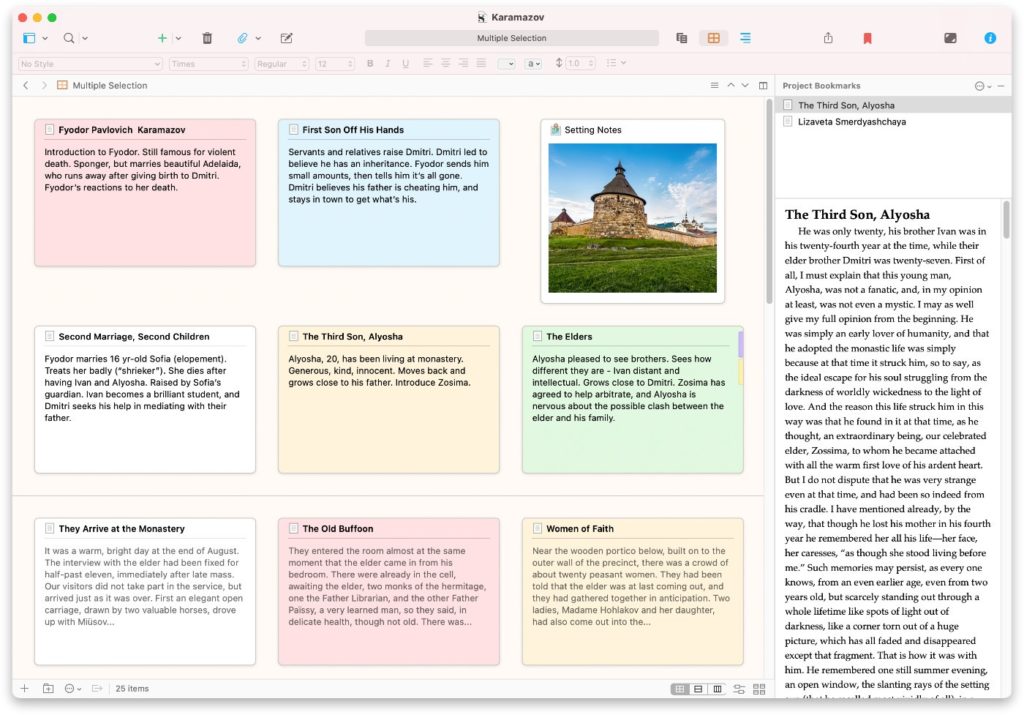
Scrivener is an outliner
The folder structure of Scrivener makes it really easy to outline your content, and they offer different views on your content structure to help visualize it. One of my favorite outlining features in the app is the ability to view all of the documents in a folder as index cards on a cork board, able to drag them around to reorder them and to add notes and images for quick reference.
The application also has a search function, allowing you to run quick text searches through all of your content. This has saved me more than once when players ask me about a certain topic. A quick search usually gets me the info I need pretty instantly.
Scrivener is flexible, can be what you need it to be
Probably one of the more daunting parts of Scrivener is just how flexible it is. It’s not overly opinionated on how you should be organizing your data, despite having some templates available that help to give you a baseline structure, but you can really set things up to work the way you need them to.
I’ve taken advantage of this flexibility for creating my campaign binder, breaking everything out into a structure that works for me rather than feeling confined to how Scrivener thinks it should be done.
How can I use Scrivener to create a tabletop roleplaying game campaign binder?
Okay, so we know what Luke means when he says “campaign binder,” and we have a basic overview of what Scrivener is and what it can do. Jumping into the creation of a campaign binder within Scrivener should be pretty straightforward.
I’ve created a free Scrivener template for creating campaign binders, which you can download here. It includes a ready-made folder structure that’s easy to reorganize, as well as a bunch of helpful template pages that allow you to get started immediately.
Generally, I’d recommend starting with either a campaign binder template or a totally blank document, as starting with a Scrivener template meant for a novel or other type of content will leave you with a bunch of unnecessary parts to clean out or update.
From there, it’s simply a matter of creating folders that represent the different sections of your binder, the top-level organization. You could visualize these as the main tab pages in a physical binder, breaking all of that paper up into easy to approach sections.
Then, breaking those main sections down further into sub-folders as needed will help to start getting a bit more organized, more granular with your binder. Subsections help to make scanning through your binder easier, segmenting their contents for easier reference.
Inside of those sub-folders go all of the goodness of your binder, that sweet sweet text. You can take advantage of Scrivener’s templating system to create the types of documents you might add to your binder as well. You might create a “Character” template page that has the info you most often want to know about the characters in your game, or a “Magic Item” template that holds the key info you’ll want to know about that “sword made of jell-o” that you gave to the party’s barbarian.
The flexibility of Scrivener means your campaign binder can really look however you want it to, as long as it helps you to keep yourself organized and doesn’t become a hindrance rather than a help. And, for that exact reason…
Tips for organizing a tabletop campaign binder in Scrivener
Because of that same flexibility in how content can be structured in Scrivener, it can be helpful to plan ahead a bit, keeping these tips in mind:
- Keep it simple! While laying out your sections is a great first step, don’t just add things you might not ever need. Not planning to add session recap notes to your binder? Delete that folder and clear up some space. This will help make your binder your own, keeping things organized to what you need and clearing out what you don’t.
- Adjust your templates as needed. Just because you created a template document thinking you knew what you needed (or downloaded my template as a starting point with its templates already created) doesn’t mean that you’ll actually want all of that in the way when creating a new document. If you find yourself not using pieces of your templates, just update them to add or remove as necessary. They’ll be easier and more enjoyable to work with in the future.
- Links, links, links! Take advantage of Scrivener’s document linking system (as easy as typing [[ and then adding the name of whatever document you’re linking, followed by ]], get more info on document linking from this page). Scrivener is pretty good at knowing what you’re trying to link, and will give you a chance to find the correct document if it gets it wrong. Clicking a document link in Scrivener opens that linked page for quick reference, which is really handy when linking to NPCs, items, or location information in your session prep.
Note: Scrivener is also mobile, or so I’ve heard
Scrivener has a mobile version for use on handheld devices, and it seems pretty neat. You can sync your documents over the cloud and access them from anywhere for quick reference or using your tablet or phone during game as your binder.
However, I’ve not personally used Scrivener for mobile, so I can’t attest to how easy it is to use. If you have thoughts on the mobile version of Scrivener, I’d love to hear them in the comments!
The Graycastle Press Scrivener Campaign Binder Template
While Scrivener can be set up any way you like, I’ve created my own template that I use whenever starting a new campaign binder. It includes all of the main sections that I use most, some that I use less often but find handy, and all of my templates that help me keep my content structured and prevent me from forgetting to add the bits that I find useful (or hold space for me to fill them in later).
You can download the Graycastle Press Scrivener Campaign Binder template here, and use it in Scrivener pretty easily. Simply open Scrivener and, on the Getting Started window that opens, click Options → Import Templates… (this is on MacOS, the process may differ on other systems)
You can immediately start adding content to sections as needed, getting you populating your binder quickly. The template is set up with sections to help guide you, each of which are shown below:
Session Preparation
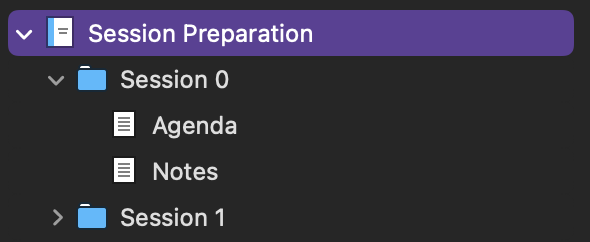
The Session Prep section is where I put all of my session prep notes. I’ll simply create a new document for each session using the Session Prep template and start planning out the game for the week.
Sometimes sessions might need more than one document (for example, I usually will do an agenda for a session zero as well as a session prep document for whatever actual in-game action I’m presenting to a new party), in which cases I simply create a folder titled appropriately for the session and add whatever planning documents I need inside of that.
For certain situations that I feel more confident that the players will encounter, I may use a Scene Plan template in my session prep to lay out the scene in a more commonly used format, similar to what you might see in a published adventure. The template includes an example of the Info Block paragraph style, but there is also a useful Dialog block. These just help call out relevant info in a scene as you’re running it, helping to keep vital info front of mind.
Document linking (this page in the O’Reilly documentation for Scrivener will give you more info on this topic, or you can go here to download Scrivener’s user manual in PDF format) is wildly useful here as you can link to other pages in your binder and click the links when running a game to very quickly refer to related info without searching.
I have some sections pre-populated in these templates, such as Session Goals, which just helps me keep in mind any goals stated by the party or for how I want to challenge them that session. Feel free to edit the template (see Template Sheets below) to make them work for your prep style.
Session Notes
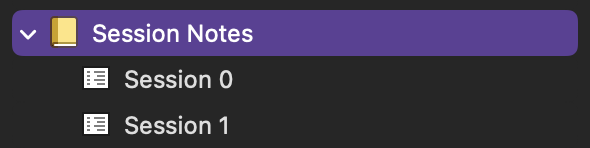
Honestly, this is one section that I could do far better in keeping updated, as it truly does pay off dividends. When I want to add notes for a session, I just add a new document using the Text Document template and type.
As in other sections, document linking is super useful here as, when I revisit a session’s notes, I can rapidly view related information and give myself a more complete idea of what happened that session without scrolling around or searching to find it.
Tables

Tabletop roleplaying games are nothing if not table-heavy, and no campaign binder would be complete without them! I’ve included the Tables section as a simple way to store tables that are not necessarily dependent on other content. For example, I might create one in the Tables section that allows me to roll for the weather on the road, but a table for a specific spell or to roll for items in a magic shop would just be added to that spell or shop’s document or folder.
It’s worth noting that, while Scrivener’s word processing powers are wonderful, it’s not necessarily an app set up for dynamic, modern tables. I’ve worked to make my table templates as useful as possible, and easy to fill in, but you may need to play with them and tweak them to make them work to your requirements.
Note: Commenter colteastwood shared that you can actually copy and paste tables from D&D Beyond directly into a Scrivener document, preserving the contents and formatting! Pretty nice little addition, and helpful to extract tables and stat blocks for quick reference inside of your campaign binder. Thanks!
Notebooks
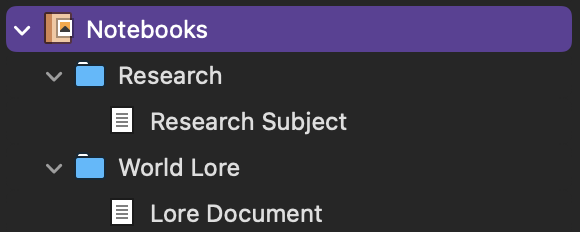
Most tabletop games have so much lore and information behind them, and the Notebooks section is to help keep all that information organized. I predominantly use this section to hold my world’s lore and history, as well as any general research I’m doing on game systems relevant to my players.
Keeping a folder devoted to my game world’s lore has been so helpful so many times, as it makes it so easy to expand that folder as needed during the game and find what I’m looking for at a glance.
Party Members
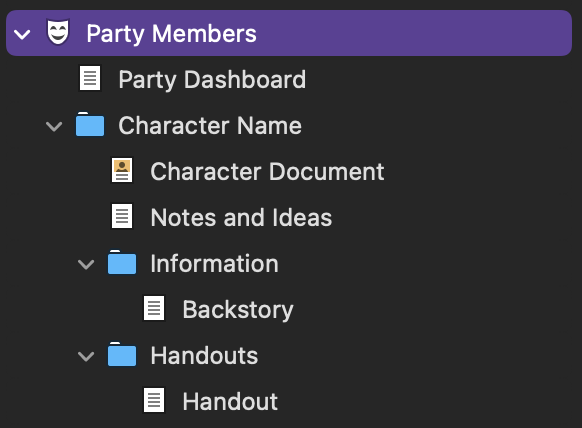
While the players in my games all manage their character sheets via D&D Beyond, I find it really helpful to keep any information on their backstories, goals, player-specific handouts, and any mechanics that are specific to them that I want to remember in a folder devoted just to them.
I even create a little “Party Dashboard” document that links to all of the relevant info for each character, making a quick reference sheet for each of them that I can use to quickly locate a specific document without expanding their folders.
This section tends to change infrequently, which helps make the manual changes required to the Party Dashboard minimal.
Locations
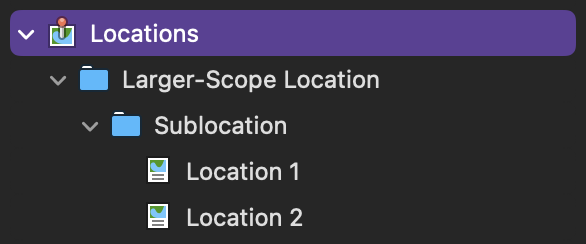
The world in which your party is exploring is diverse, and they will undoubtedly see many places within it before the campaign is through. The Locations folder helps to organize the wild amount of info needed to make these worlds feel more real in a simple folder structure.
At the top level, folders are created to represent larger-scope locations, such as regions or cities. For example, in my current campaign, the party is in the Forgotten Realms, exploring the Sword Coast region. I have a top-level folder for the various cities and towns the’ve visited (so one for Neverwinter, one for Waterdeep, one for Leilon).
Inside each of those top-level folders are more folders, each representing a smaller-scope area within the top-level item. For example, for my top-level folder for the City of Neverwinter, I have a sub-folder for each of the districts within that city.
Finally, inside the sub-folders are documents representing each specific location, using the Location template. The location’s document includes descriptive information about it, links to characters who might be connected to it, and any notes about it that have been added through the player’s interactions there.
In cases where a location requires more than one document (a shop where I have a table full of their goods as well as a character document for the shop owner) I’ll simply add a folder instead, named with the name of the location, and then include its requisite documents there. Simple!
Organizations
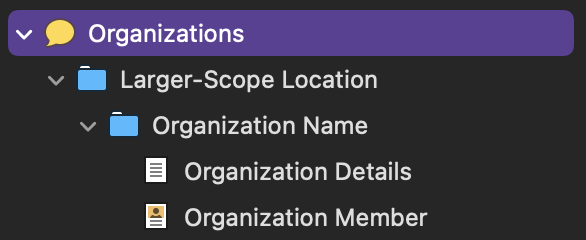
The Organizations folder is a bit of a large one. Where Location focused in on specific locations, Organizations seeks to collect all in-world organizations along with their related characters.
For this folder, I again tend to start with a regional top-level folder. For my game, I have a folder for the City of Neverwinter, City of Waterdeep, etc. These are helpful collections of organizations gathered by their region. This top-level folders might be different for your game, but still serve as a way to organize the groups in your world in straightforward ways.
The sub-folders, then, each represent an organization. This might be a governing council, a guild, a local tribe of goblins, etc.
Finally, inside the organization’s specific folder, we have information on the organization and its history (with relevant documents created using the Text Document template, for its flexibility) as well as a Related Characters folder. This holds each character, created using the Character template, defining their name, characteristics, notes on any voices I’ve used for them, and any additional notes. I also include document links to any quests, tasks, or story hooks related to the character (see Quests and Story Hooks below).
You can drag and drop character images onto the sidebar, too, by clicking the small image icon. This is so good for adding character portraits, helping you keep any artwork that’s inspired this character close to hand.
Unaffiliated Characters

When a character just doesn’t seem to fit in an organization, as above, I add them to the Unaffiliated Characters folder. Sometimes your characters interact with random people and creatures in the world that don’t fit into a larger organization (or at least not one important to your game enough to record it and flesh it out more).
Add any of these characters to this catch-all folder using the Character template.
Handouts

While I tend to keep many of my handouts and documents organized in Google Drive for ease of sharing with my players and ease of organization, sometimes I want to reference them from other documents in Scrivener. It’s easy enough to add a link to the document in Google Drive, sure, but by adding them as a handout in this folder I can use document linking to make quick-reference links to it from other documents.
This is especially handy with things like maps. Linking to a map from my session prep means I can just click the document link and have the map appear right inside of Scrivener.
To add a handout, just drag and drop the file you’d like to save in your binder to the Handouts folder and it should add itself nicely.
Quests and Story Hooks
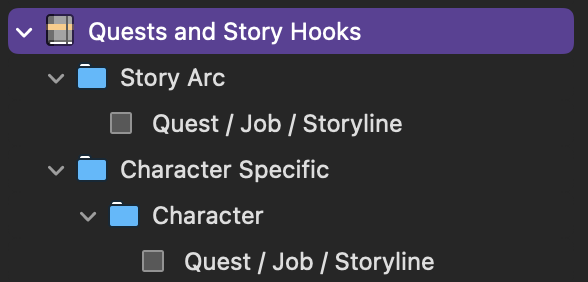
The wide variety of tasks, story hooks, and quests that parties have to manage in tabletop roleplaying games is nothing compared to trying to wrangle them and remember the details as the game master.
This folder has two top-level folders, Story Arc and Character Specific (with the Character Specific folder having a folder for each party member or NPC that has this quest related to them). Adding a quest or story hook to these folders using the Quest / Job / Storyline template helps to remember who gave the party a task and when, the rewards that were promised as well as any developments or notes for that quest that come up.
Often I’ll find myself with a “Miscellaneous” top-level folder for the one-off tasks or quests that are somehow not related to a specific character or organization.
Items and Equipment
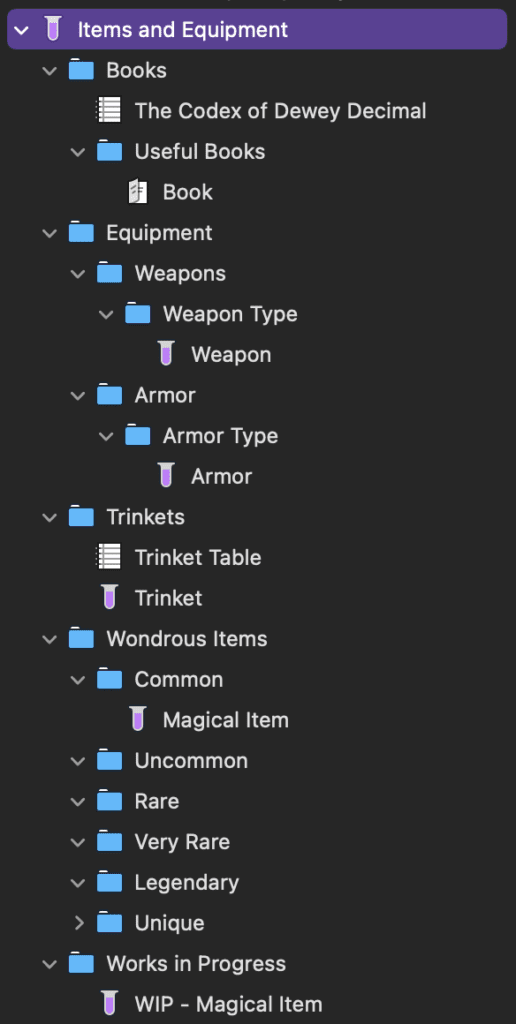
While the number of quests and tasks in the average game might be a little daunting, we game masters freakin’ love magic items. They’re one of my favorite parts of the game, but keeping tabs on the random items I’ve found or created and want to include in my campaign can be difficult.
This folder is broken into top-level folders by item type: books (or documents), equipment, trinkets, wondrous items, and works in progress. Each folder is further broken down into a structure that makes sense for that specific type of item. For example, equipment is broken down into weapons and armor, and wondrous items is broken down by Dungeons & Dragons 5th Edition rarity.
I’ll then add my items using either the Magical Item template (for the more straightforward items) or the Magical Item (Table) template (for items that have effects that you need to roll on a table for).
The only exception to the two above in my current set of templates is the Trinket template. I use the term “trinket” in my games to refer to “flavor only” items, those that are unlikely to have a game-impacting use that I hand out to my players like candy. They’d fall under the “common” rarity.
Spells and Powers
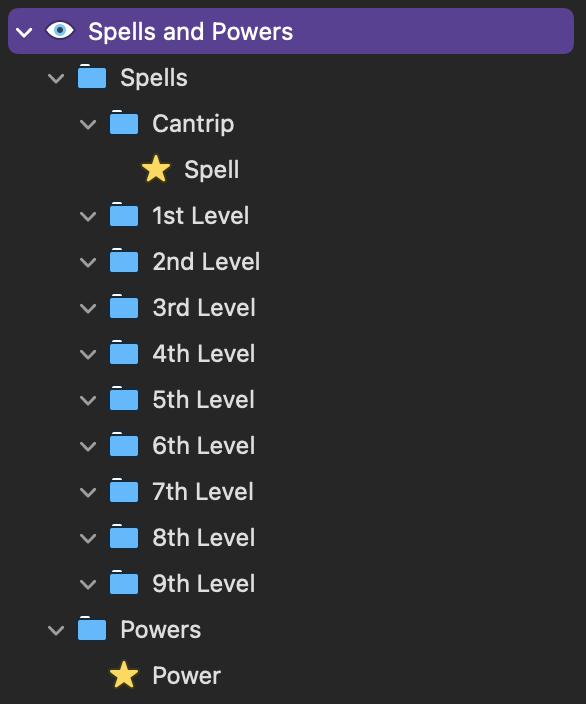
Almost as delicious as items (yes, delicious) are the fun spells and powers that we add to the game. Sure, Dungeons & Dragons already has some pretty great magic (I’ve gotten into a lot of good trouble with the Message spell alone), but there’s always more to find and add to the game!
This section is broken down into Spells and Powers, where Powers relates most frequently in Dungeons & Dragons 5th Edition to things like abilities granted by class features or feats.
The Spells section is then broken up by spell level, which is admittedly specific to 5th edition. You can add spells to each of the levels using the Spell template.
Powers is a little more loose as they might correlate to a specific character, class, or something else entirely. Feel free to create sub-folders as needed or leaving it just the top-level folder. Powers can be added using the Power template.
Encounters

This is a section I’m planning to expand on a future version of my template, adding the ability to write out more complex encounters. While this might not apply to stumbling on a camp of monsters in the woods if the expected intent is a straightforward fight, if you want to add monster tactics, backstory, or flesh out non-combat information about the creatures in the encounter, you can use the fledgling Encounter template.
These could also relate to non-combat encounters, like puzzles.
The template and folder structure will evolve over time, and I’ll be sure to add updates to this guide once they do.
Template Sheets
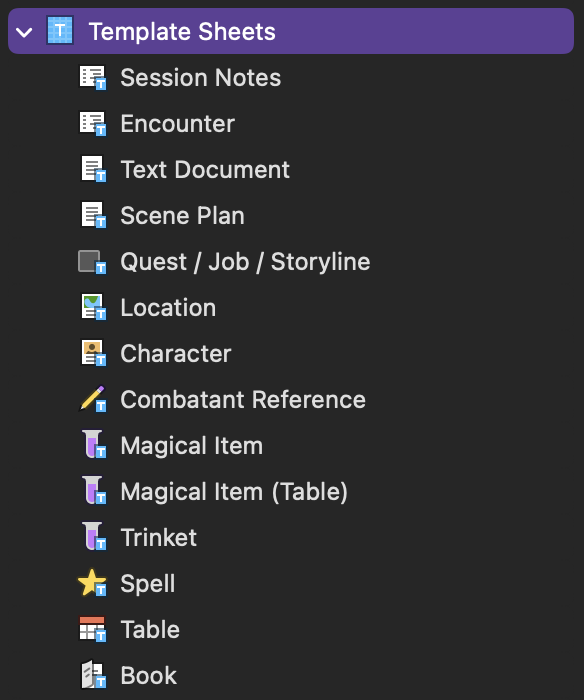
This is where the magic happens with almost everything above, the Scrivener folder that stores all of the template sheets used in other sections. This section is really useful and powerful, as you can pretty easily edit every template and make them look exactly how you’d like.
Changes you might want to make to the templates include what information you want to record about characters, how the quest template is structured, or changes to the layout and fonts of all templates.
To change the format or contents of a template, just open an existing one and… change it! It’s really that easy. Next time you go to create a document using that template, you’ll see your changes right away.
To create a brand new template, create a document in the Template Sheets folder using any other template available, customize it, and change its name. Your new template will be ready for you next time you go to create a document.
Get the Free Graycastle Press Scrivener Campaign Binder Template
Note: You can learn how to use a template with Scrivener on their documentation
Other Options for Tabletop Roleplaying Game Campaign Binders
There really are a dazzling number of ways you could create a tabletop roleplaying game campaign binder, including the old stand by of a physical binder with tabs. Scrivener is just the way I’ve found to make it work, but you could use something different like Microsoft OneNote, a straightforward word processing tool like Google Drive, something built more specifically for this kind of data like World Anvil or Kanka, or a feature rich wiki tool like Notion.io.
Really, the end goal is simply to experiment whatever tools work best for your style and land on something that helps you to stay organized rather than getting in the way. For me that might be Scrivener, and I imagine it will work great for plenty of other folks as well, but perhaps not.
In the end, your campaign will only benefit from better organization.
Frequently Asked Questions about Campaign Binders and Scrivener
Is Scrivener free? What does it cost?
Scrivener is not a free application. At the time of writing it costs $49 for MacOS or Windows if you purchase from their website, and the iOS version costs $19
How bad is the learning curve for Scrivener?
I won’t lie, it took me a bit to get familiar with some of the more intricate pieces of Scrivener, but in general I don’t think setting it up as a campaign binder should be too difficult (especially if you use my template, which you can find here). A lot of the complexity with Scrivener comes when you’re formatting for longer content, like books, and dealing with the app’s robust export functionality.